 Happy Halloween! I hope Sandy didn’t ruin your plans for tonight. Ours include handing out candy to the 150 kids who stop by every year and trying to put our girls to bed at their usual 7 p.m. bedtime. Exciting stuff! Nora went as a dragon for her first Halloween. Actually she didn't go anywhere, but I managed to stuff her into the suit for photos. I've been coveting this dragon costume, which belongs to my nieces, and finally had a baby the right size to wear it. (In these photos you can see the shenanigans that go on around here when I get out my camera.) Cricket's costume is another story...I asked her about a month ago what she wanted to be for Halloween, thinking she would have no idea what I was talking about and I'd get to choose something cute and easy. "Goat," she said. I kept hoping a simpler demand would surface, but she stuck to that response each time I asked. There was no way my crafting skills could produce anything resembling a goat, but how could I say no to such a funny request? So I gave in and bought the only toddler-sized goat costume—and possibly the most expensive costume—on all the internet. As we awaited its arrival, Cricket informed anyone who would listen that she was going to be a "goat costume" for Halloween. But I knew from the look on her face when we opened the box there was no way she would ever wear the costume. I don't know what she imagined when she asked to be a goat, but it certainly wasn't this creepy, full-body get-up. Here is some documentation of our last attempt to coax her into the goat costume. First we lay the costume on the floor. She ignored it and ran around like a madwoman, flashlight in one hand, apple in the other. Then we asked her to point out her favorite features of the costume, of which there were several. Then she decided Nora should try on the hat. Nora thought the hat was pretty great, so we had a glimmer of hope. That hope was soon dashed. And in a final moment of refusal, Cricket sat down on top of the costume to eat a snack of string cheese and cereal. Oh, well. We'll never forget the year Cricket refused to be a goat. Next year we'll find something less scary to wear. Now tell me, did you ever have to coax your kids into their costumes? Did anything work? 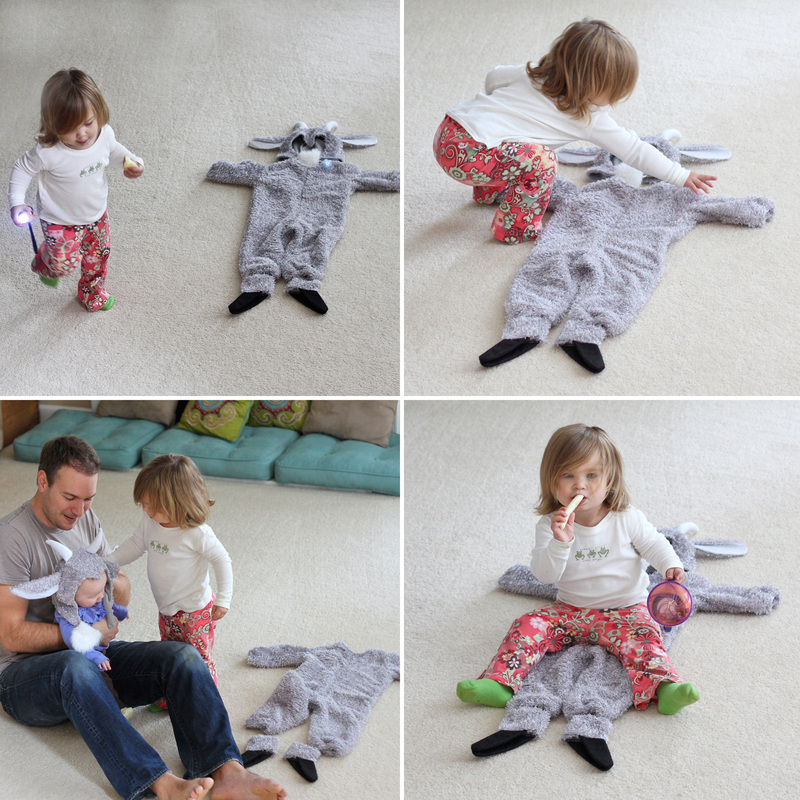
0 Comments
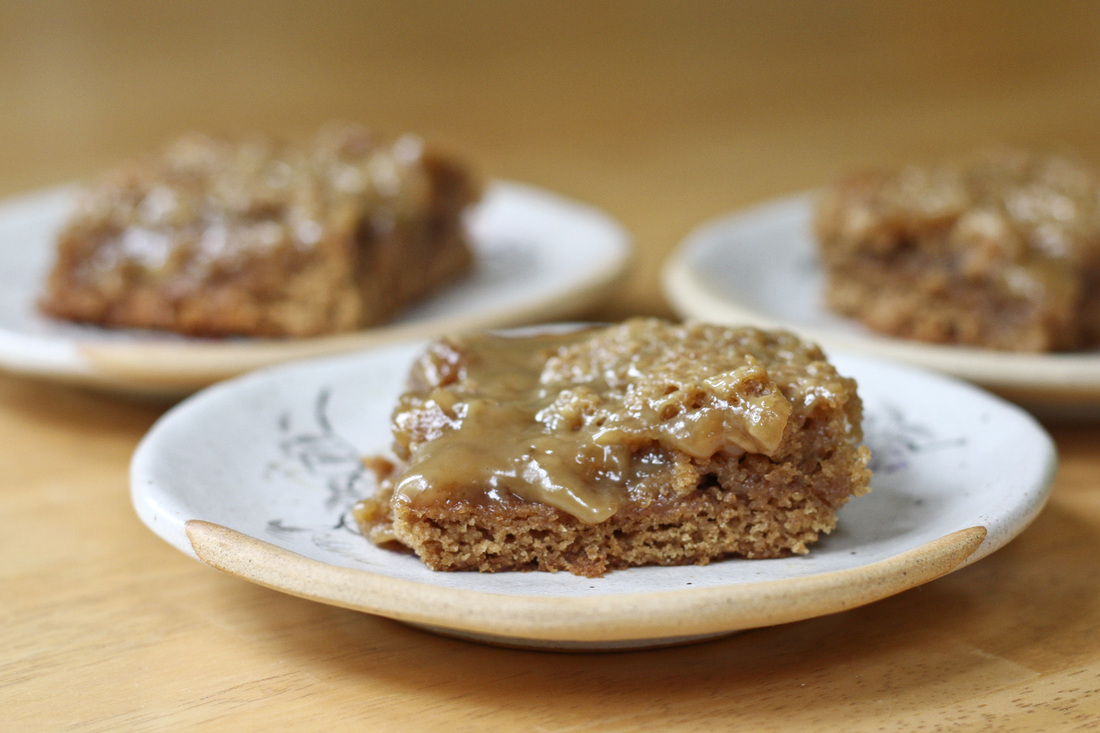 Halloween strikes fear in my heart, not because of the spooky costumes and our neighbors' eerie lawn decorations, but because Cricket has a severe nut allergy. (Think: possible anaphylaxis. Think: must carry EpiPen at all times.) Candy and other holiday treats are often laced with nuts, whether nuts are a main ingredient or not. And there is always a question of improper labeling; even if labels of processed foods don't indicate the inclusion of nuts, the possibility is always there, haunting moms of nut-allergic kids. Cricket now notices and requests treats other people are eating, and I'm finally comfortable letting her partake if those foods are allergy safe. Since homemade snacks are easier to control for nuts than processed ones, I’m trying to start baking more often again. I'm also trying to expand my chocolate-all-the-time-in-any-form frame of reference, since chocolate is notoriously risky for nut avoiders. With the holidays—in all their nut-filled goodness—upon us, I decided to launch an occasional column called "Nut-free eats." This blog isn't really a baking blog, and I'm not really a food blogger or photographer, so bear with me. I'd just like to share some safe and gooey recipes with you from time to time, should you be in need of some nut-free ideas.  For the inaugural column, I made these caramel cinnamon bars. I avoided using packaged caramel to be safe and made my own…lots and lots of it. The bars were a big hit with Jeff, who actually prefers caramel to chocolate(!), and Cricket, who was thrilled to hear I made a treat just for her. When I explained that a bar was like a cookie—she tasted her first cookie last weekend—she squealed. She investigated the bar, nibbling and nibbling before delivering her verdict: "I like it! I like that bar!" Ahhh, the sweet taste of success. 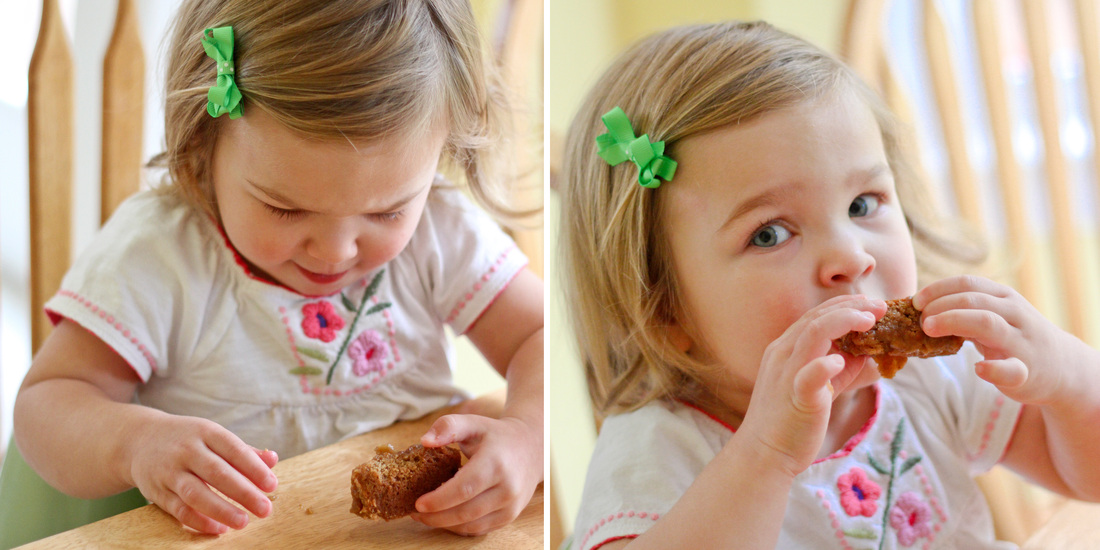 Captions: Cricket admires her treat while Nora looks on, wishing she could use her first tiny tooth to demolish a few bars.  Caramel cinnamon bars
Adapted from buns in my oven and smitten kitchen For nut-free baking, always remember to check each individual ingredient to make sure it is not labeled as containing nuts, “may contain” nuts or “processed on equipment that also processes” nuts. Bar batter 1 1/2 cups flour 2 teaspoons baking powder 2 1/2 teaspoons cinnamon 1/4 teaspoon salt 1 1/2 cups firmly packed brown sugar 1/2 cup butter, melted 2 eggs 1 tablespoon vanilla (I use Rainforest Spices vanilla, which comes from our favorite organic spice plantation in Costa Rica, Villa Vanilla. If you're in the neighborhood, take a tour. It's unforgettable!) Caramel filling 2 cups heavy cream 1 cup packed light brown sugar 2 tablespoons light corn syrup 2 teaspoons vanilla pinch of salt Preheat oven to 350°F. For batter: Mix flour, baking powder, cinnamon and salt in medium bowl. In a separate bowl, mix brown sugar, butter, eggs and vanilla. Add the dry ingredients to the wet and mix. Remove 1 cup of batter for later use. Spread remaining batter into lightly greased foil-lined 13x9-inch pan. Bake 10-12 minutes or until firm. For caramel: In a small sauce pan, bring cream, brown sugar, corn syrup and a pinch of salt to boil over medium heat. Stir continuously for 14-17 minutes, then stir in vanilla. Remove from heat and let thicken for several minutes. Pour caramel over baked bars in pan and spread evenly over top. Drop spoonfuls of uncooked batter into caramel, then cut through batter with knife to spread. Bake 18-24 minutes or until center is set. Cool in pan. Cut into bars.  Yes, that's right. We now refer to Nora as "pillowy," in addition to roly poly. (Jeff deserves credit for this new descriptor.) So for Nora's 5-month portraits, I decided to convert the images to black and white to capture the full glory of her pillowy, roly poly self. Black and white can create a softness that is tough to come by in color. Despite wielding a camera for more than 20 years, I still learn something each time I compose a photo or sit down to edit one. I'm not exaggerating. The constant learning is something I love about photography. If I want to try a new editing technique, I just start Googling to find a few free tutorials on the subject. It's so much easier now than it used to be to find useful photography information. In the spirit of sharing photo tips, I planned to write a full-on tutorial about creating quality black and white images, but then I got started and thought, "Oh my gosh. I don't have time to write this right now!" (Contrary to what some people think, you typically have to do more than hit a "black and white button" in your editing software to create a pretty black and white photo.) Instead I'll point you to Google or Pinterest for more in-depth tutorials, and you can just enjoy these photos and few pointers to supplement your own findings.  Start with good lighting. Black and white photos can be either stunning and dramatic...or just plain boring. Despite the effect you're going for, you typically want to capture the full range of light from black to white, not just a mish-mash of (boring) grays. I like to take baby portraits in my bedroom, which gets a ton of indirect sunlight from South-facing windows. Good lighting lays the bones for a quality image, whether black and white or color.  Increase the black, increase the white and brighten the gray. There are many ways to accomplish these edits. I’ve used Photoshop since the dawn of time—thanks to my dad, who introduced me to it—and have added Camera Raw into my repertoire in more recent years. In these photos, I lightened each image by increasing the exposure but reducing the brightness/highlights, so I wouldn’t bleach out Nora’s skin and lose the detail of those little folds and creases. I also wanted to maintain some of the detail of the beautiful blanket she is lying on, which my aunt made for us as a wedding gift. (Thank you, Ann!) To accentuate Nora's dark eyes, I increased the black/shadows and lightened the gray tones.  I love these rolls!  Experiment with contrast. Increasing contrast can create more drama while reducing it can create a flatter, grayish image. However, too much contrast can be, well, too much. So I play around with the contrast slider to further tweak the range of black-to-white without making the image too stark. Again, you don’t want to lose all detail in either the dark or bright areas.  I couldn't resist a detail shot of these goofy ears before her hair grows in and covers them up.  When a photo—either black and white or color—catches your eye, study it to figure out what draws you in. Then try to emulate. I collect family photography ideas here.  Check out Nora's previous portraits: arrival, birth announcement, 1 month, 2 months, 3 months and 4 months.
Check out a few of Cricket's portraits: birth announcement, 20 months and 21 months. 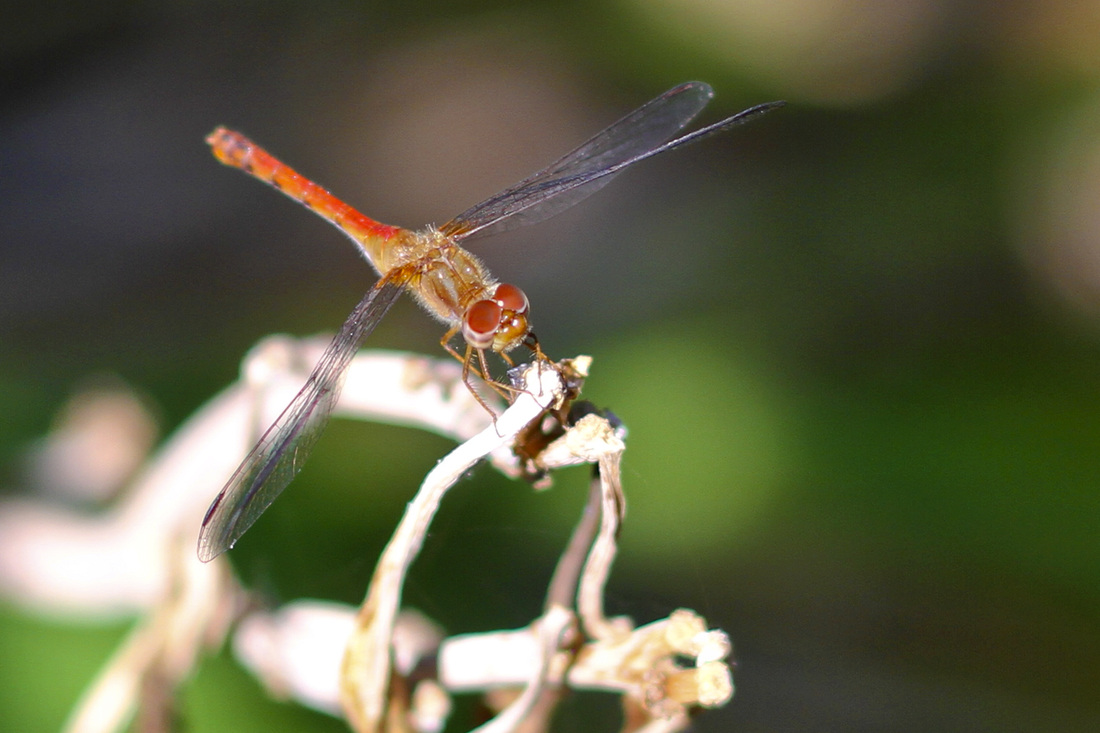 Don't you love how children are in constant awe of nature, always drawn to smelling pretty flowers or inspecting interesting insects? My toddler is forever reminding me to soak in the intricate details of the life surrounding us. This holiday season, consider giving the gift of a bit of nature that doesn't make a mess or require feeding. How about one of these new dragonfly images? (You can read about where I snapped these photos here.) From now through December 10, 2012, receive 25% off the print price of any size of "Red dragonfly" (above) or "Dragonfly silhouette" (below). If you are interested in purchasing a canvas print, please contact me for pricing. 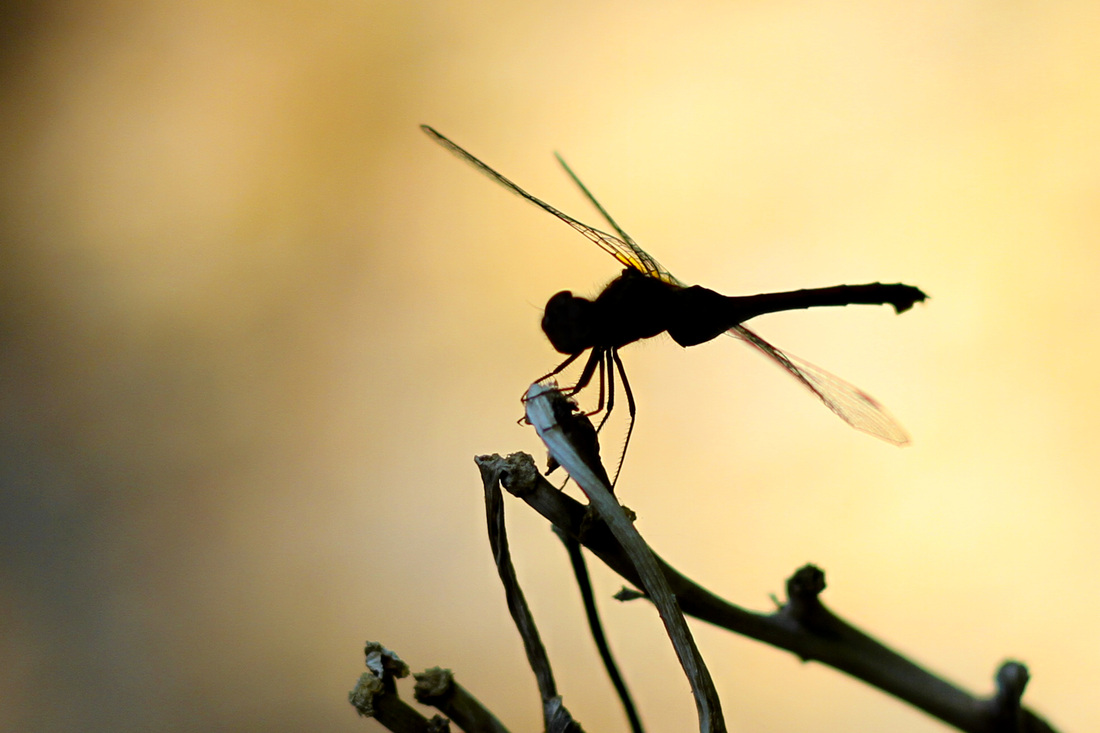 This featured photo discount is the first of several large discounts I'll be offering this holiday season. Keep an eye out for the next one, which I'll post November 5.
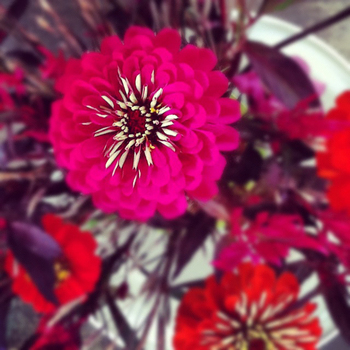
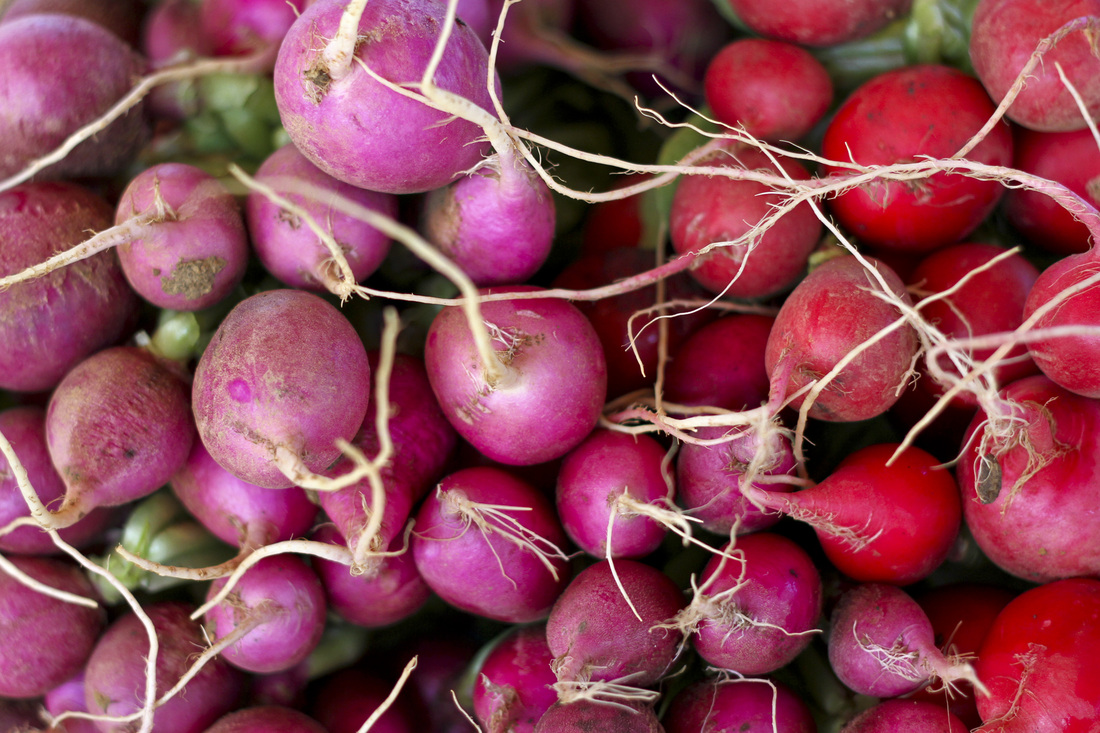 A town full of artists, writers and farmers sounds like our kind of place, so it's surprising that it took us this long to visit historic Hillsborough, NC. (We actually picked up our marriage license at the courthouse there several years ago but were too engrossed in the moment to explore.) Inspired by Design Mom's Love the Place You Live series and desperate to find a new, family-friendly activity, we loaded up our entourage last Saturday morning and headed to Hillsborough. Our first stop was the Eno River Farmers Market, where we bought delicious herbed goat cheese and a handful of dahlias the size of my head.  We also happened upon a bluegrass band, which serenaded the girls with "You are my sunshine." What luck! 
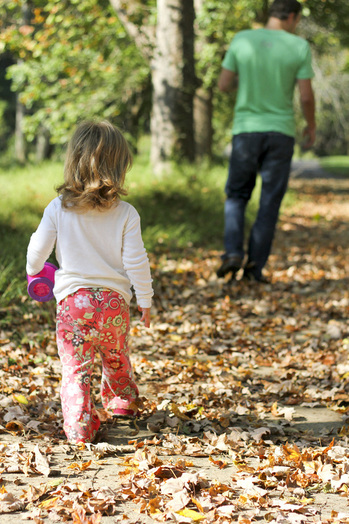
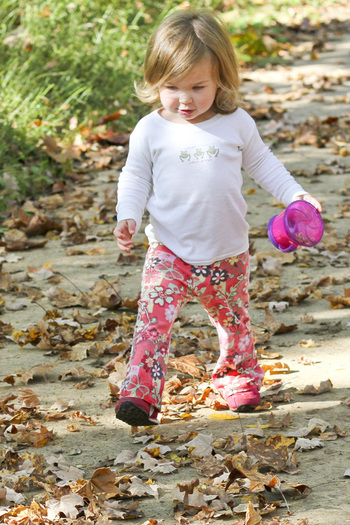
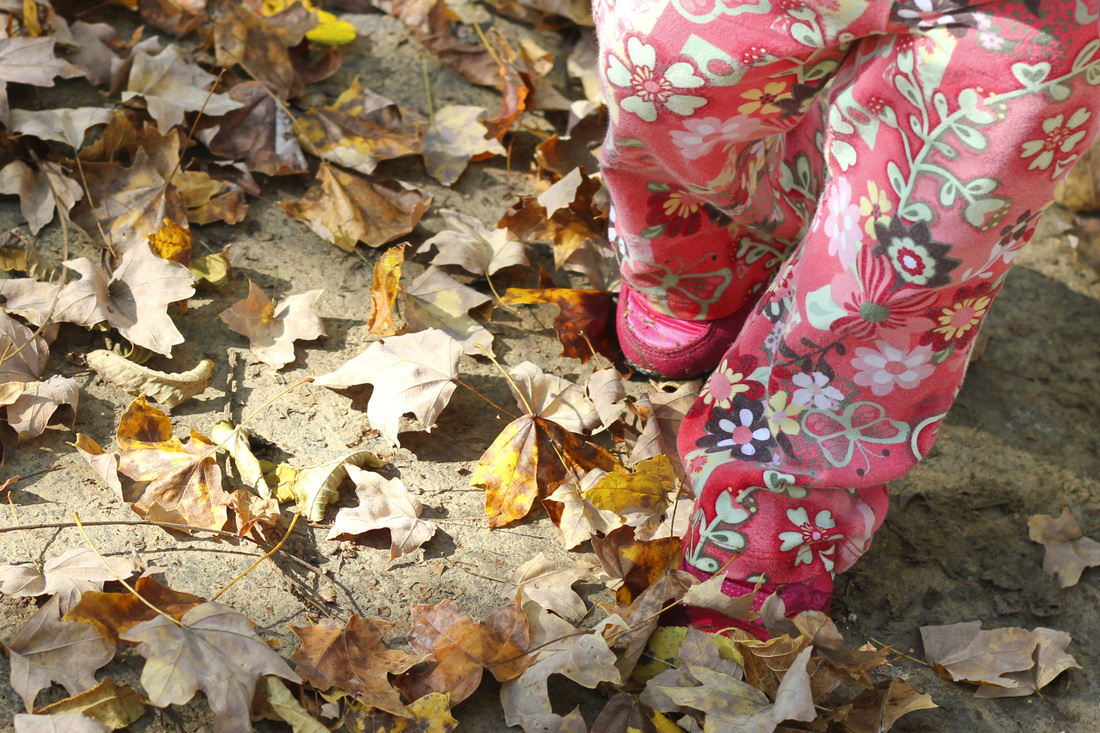
From the farmers market, we wandered down to the Riverwalk, a dirt path that winds through a park and along the Eno River. 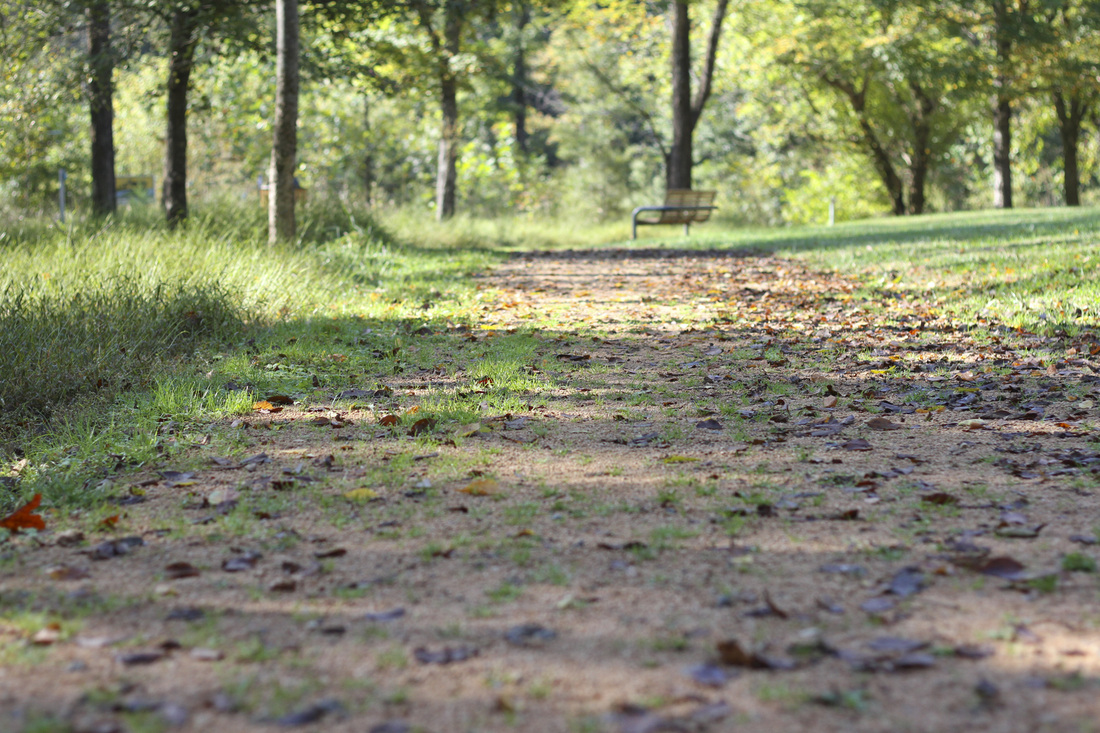 There was a lot of leaf crunching to be done along the path.
 Then we walked a block to the main drag and stopped into Weaver Street Market, a local coop, for some coffee, bread—to enjoy with our goat cheese—and pumpkin scones. Yum. 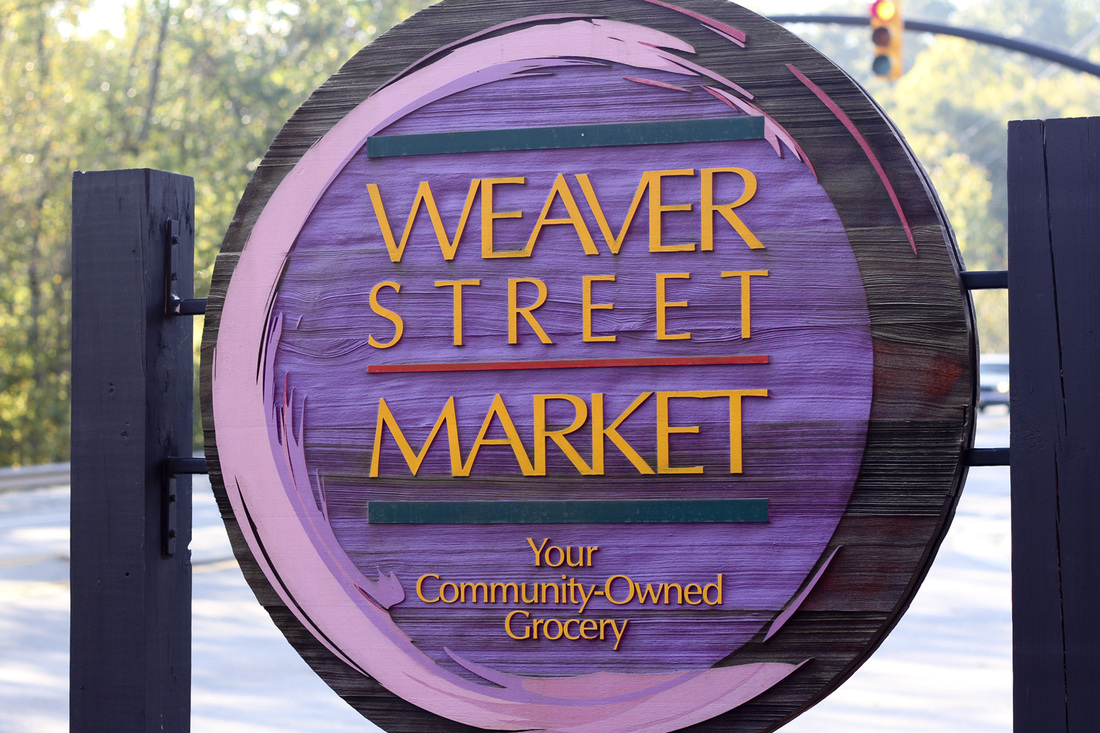 The few blocks making up the downtown area are filled with galleries, a yarn store, a chocolate shop, several restaurants, an old-timey hardware store and the sweet little Purple Crow Books, where I could spend every Saturday morning of my life. 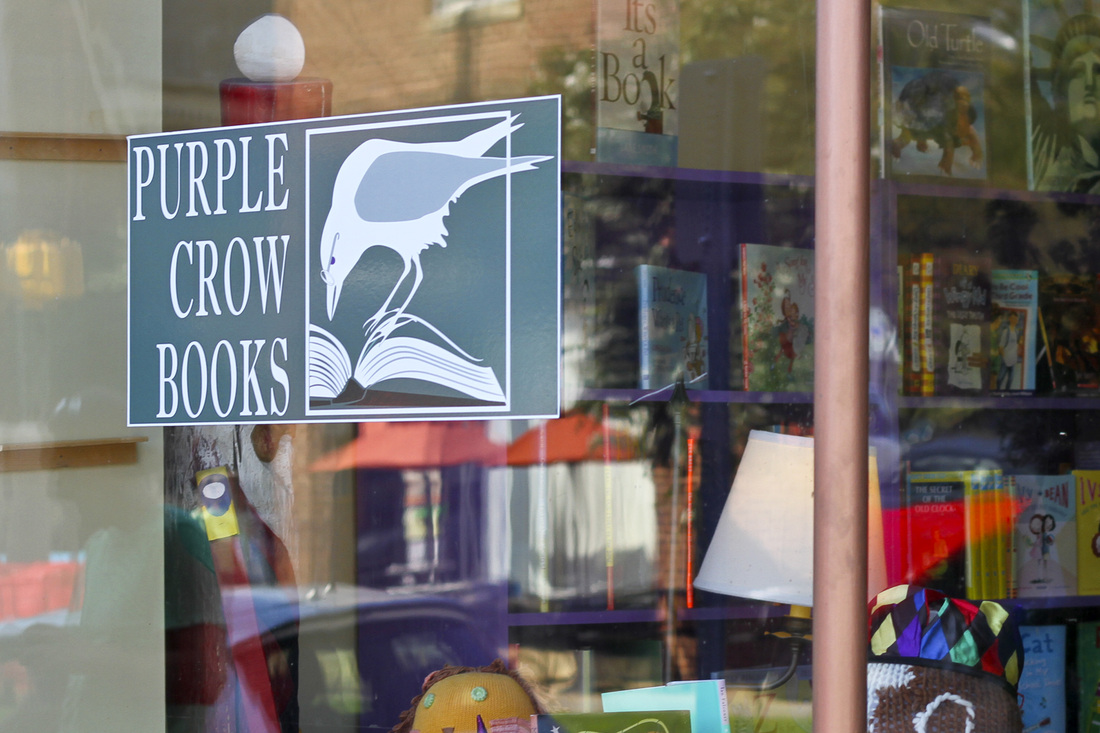 The prominent fire station was an exciting bonus for the toddler among us.  As I mentioned in my last Love the Place You Live post, we're starting to get antsy about whether to stay in North Carolina or make a big move before the girls are school aged. This decision is a difficult one; my mountain-loving heart belongs in the Rockies, my husband's surfer heart belongs at the beach and someone has to make a living along the way. But this little outing got us thinking...Perhaps we actually belong in quiet, artsy, idyllic Hillsborough? 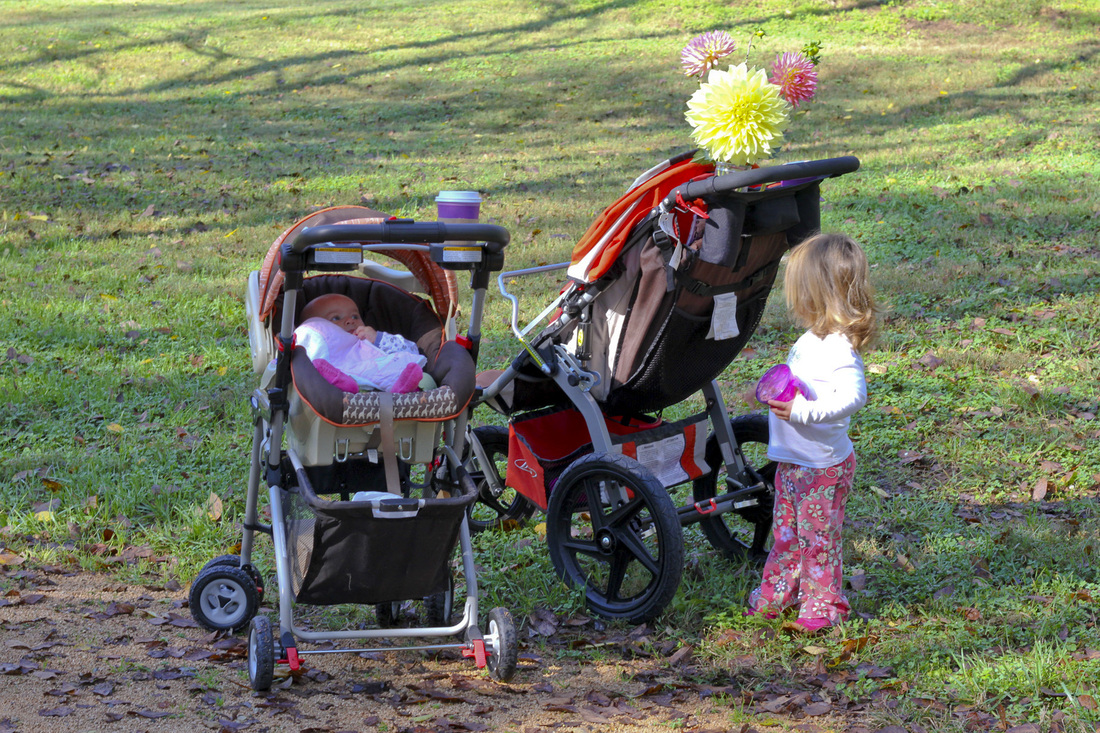 P.S. Here’s one last photo in case you're doubting my claim to have bought dahlias the size of my head or wondering what kind of gear it requires to spend a morning out with two under 2 years.
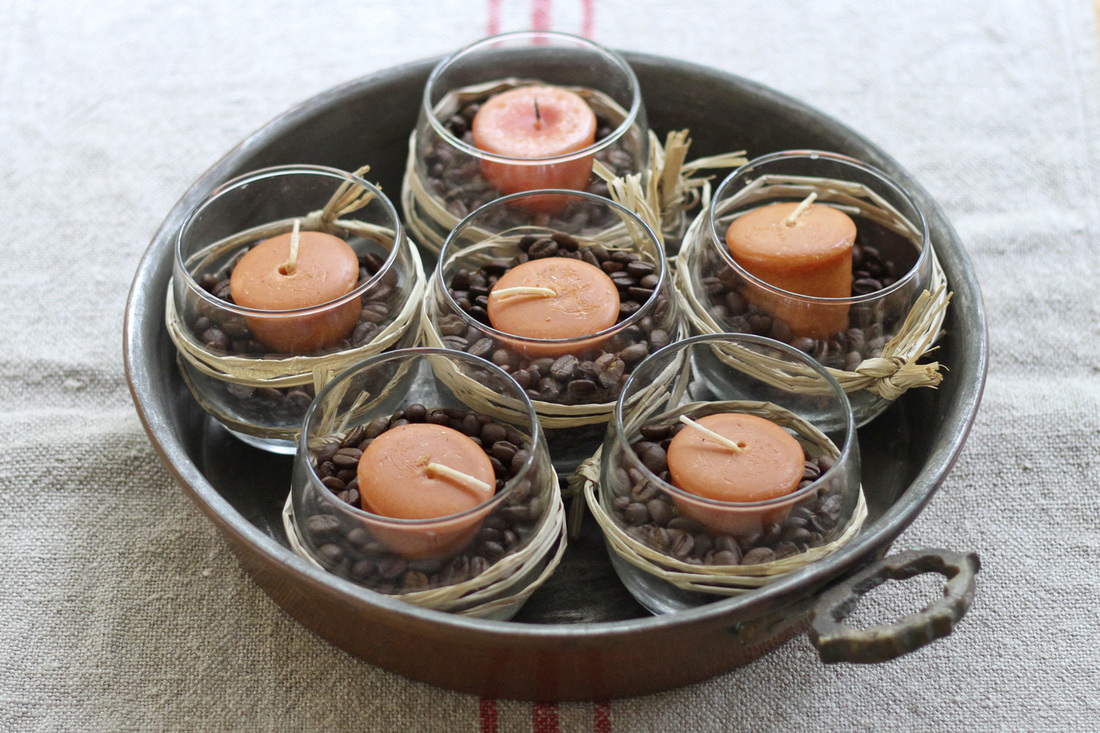 We used to sprinkle display-type items around the house: a few vases arranged on an end table, a decorative bowl on the coffee table, a pretty candle by the edge of the tub. Now the surfaces in our home can be divided into two categories: empty (to protect our belongings from the curious and clumsy hands of the toddler); or piled high with diapers, spit-up rags and toys. But I'm vowing to add a third category this holiday season: tidied and topped with something simple and pretty. As a start, I dug out this little fall centerpiece I pulled together a few years ago, inspired by Martha Stewart. I love the mix of colors, textures and scents—the rustic imperfection. It's also self-contained, easily embellished and low-profile, so you can talk to your companion across the dinner table without interference. Want to give it a try? Let me break it down. You'll need a few bags of coffee beans, five or more round glass vases, raffia, a votive candle for each vase (I chose pumpkin spice, which is the only candle scent I can stomach) and a round or square pan or tray. Aside from the coffee beans, you should be able to find the supplies at Michael's or A.C. Moore.  Fill the vases with coffee beans. Wind the raffia around each vase several times and knot. 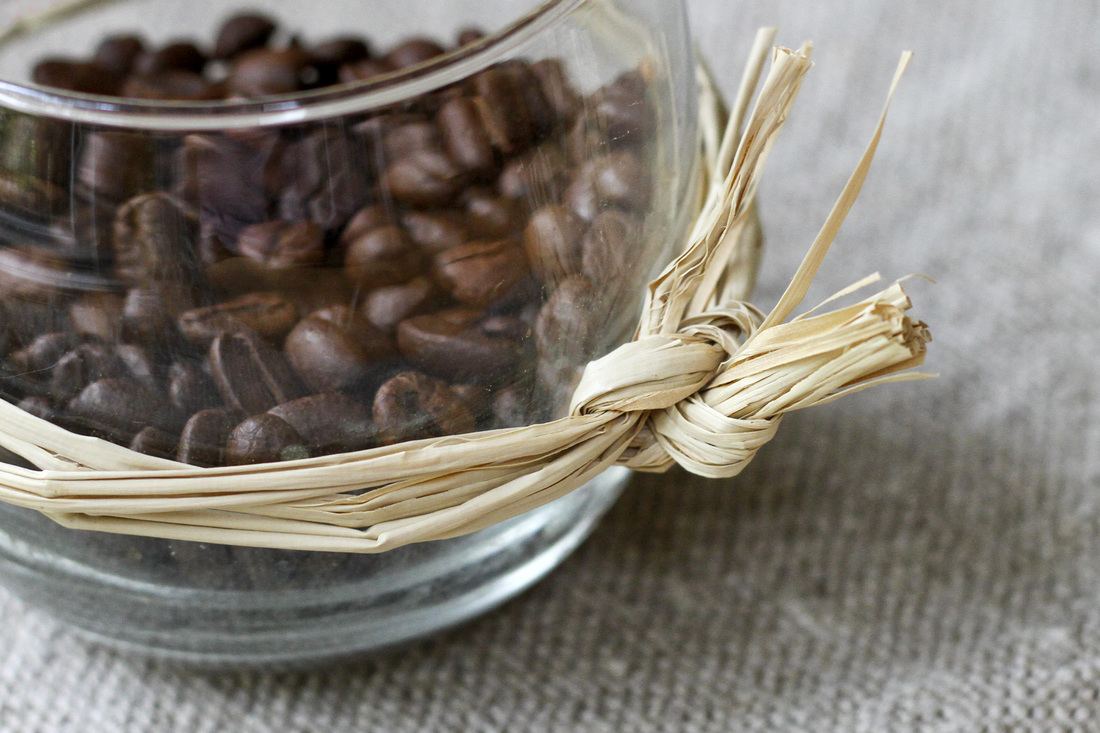 Nestle a candle into each vase. 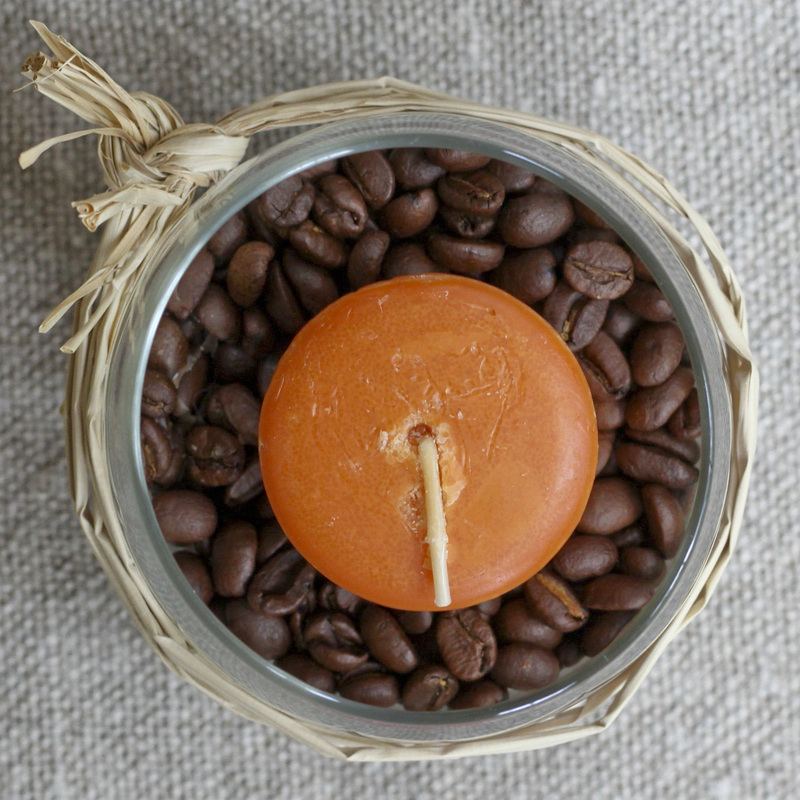 Locate the awesome copper pan your in-laws gave you—a memento from the years they lived in Iran. Don't have one? Any round or square pan or tray should do. Try to use something with interesting texture. 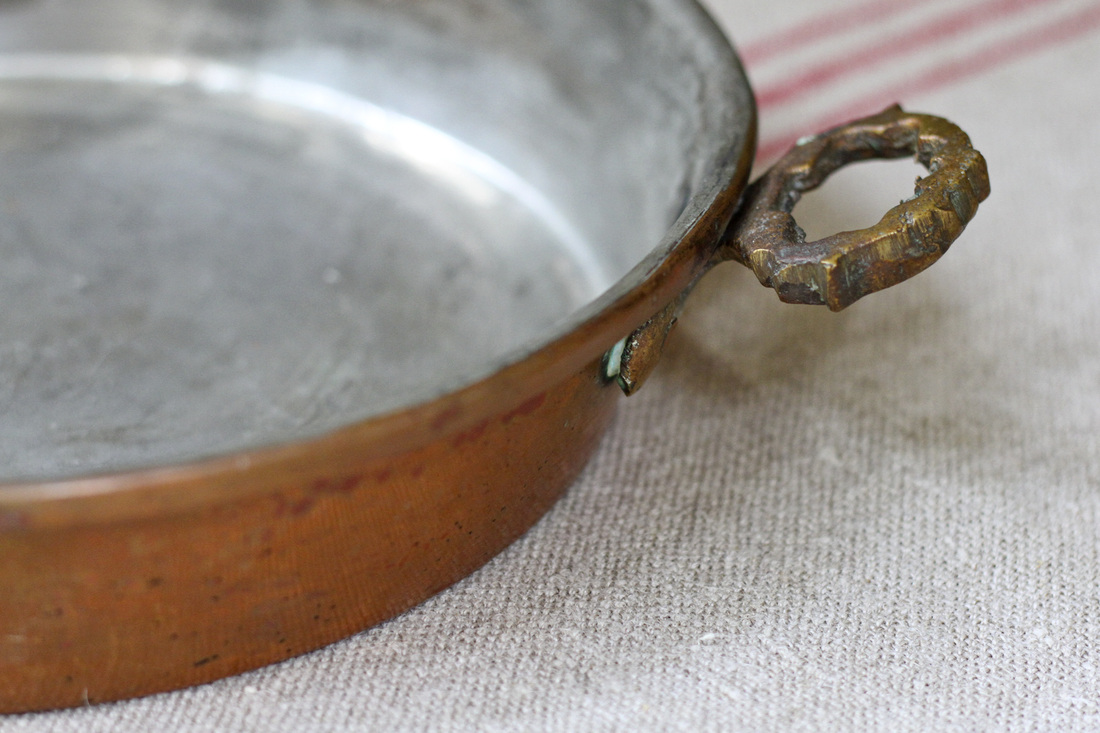 Place the vases into the pan and voila: you've got a simple fall centerpiece. Now you just have to find a tidy surface to display it...  Need some gift ideas? Check out these simple DIY projects: embellished Christmas stocking, no-sew tutu, photo plaque, heirloom display and gift tags. You can also view my holiday discounts and nature photo shop.
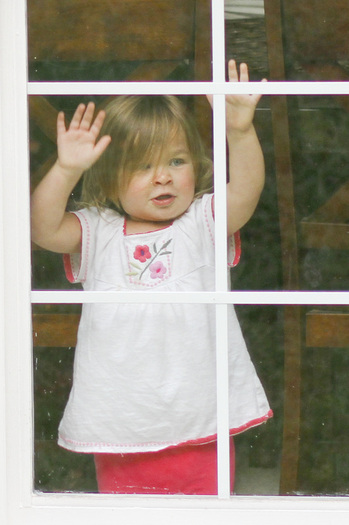
 Fall is finally settling in on us in North Carolina. It's chilly and rainy and the colors outside are beginning to fade and mellow. (Except for the grass, which is neon green this time of year.) As I sit here sipping spicy Good Earth tea and nibbling a donut-muffin from one of my favorite local bakeries, Scratch, it seems like a nice moment to share with you some of the cozy tones and textures appearing in our yard. When I first moved down here, the concept of planting another round of flowers in the fall was foreign to me. Wouldn't the snow just cover them up in a few weeks? Oh, wait...there wouldn't be snow in a few weeks...Now I love when mum season rolls around—all those burnt oranges and burgundies and yellows and lavenders spilling from our gardens and our neighbors'.  Several years ago, we planted pampas grass in a far corner of our backyard. The grass eventually took hold and began to grow, though considerably slower than we'd envisioned. Then a few weeks ago, we returned from a trip, looked out the window and gasped. Our pampas grass had grown several feet and sprouted amazing tassels while we were away! 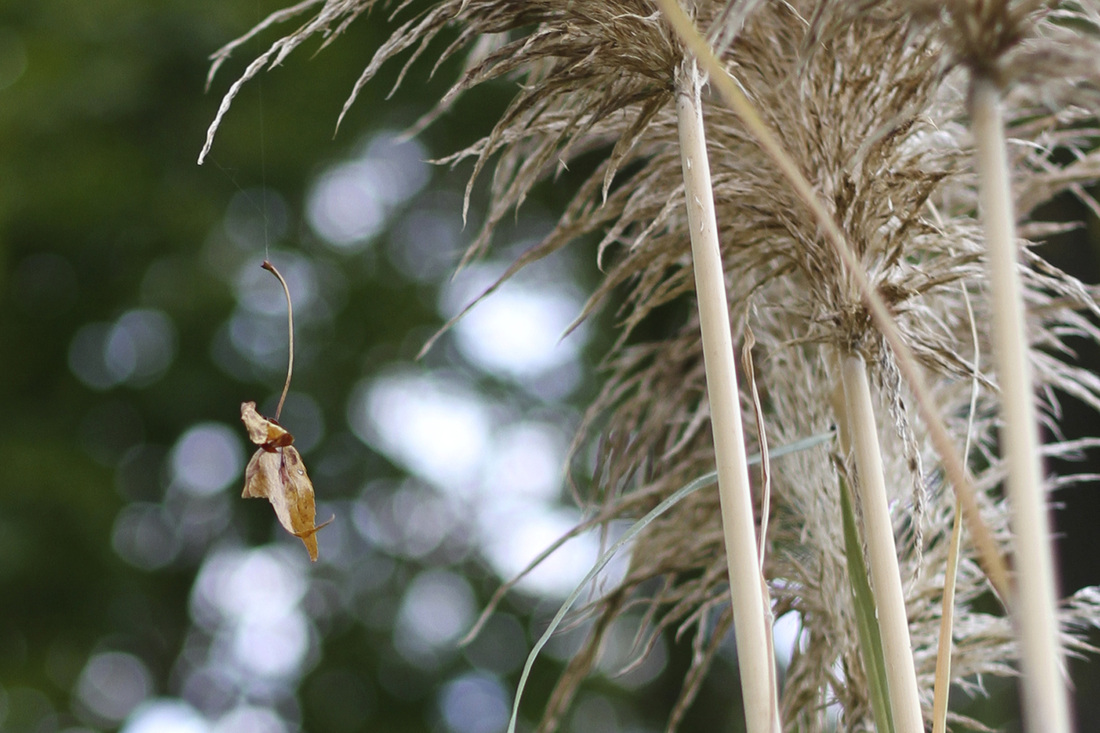 [Aside: As I was photographing the grass, I heard someone pounding on the window from inside the house. Cricket, who had been playing with Dad and Nora, could no longer be contained and was desperate to join me in the yard. How could I not oblige?]
Okay, back to that grass. I love this view of one yellowy-orange blade peaking through. 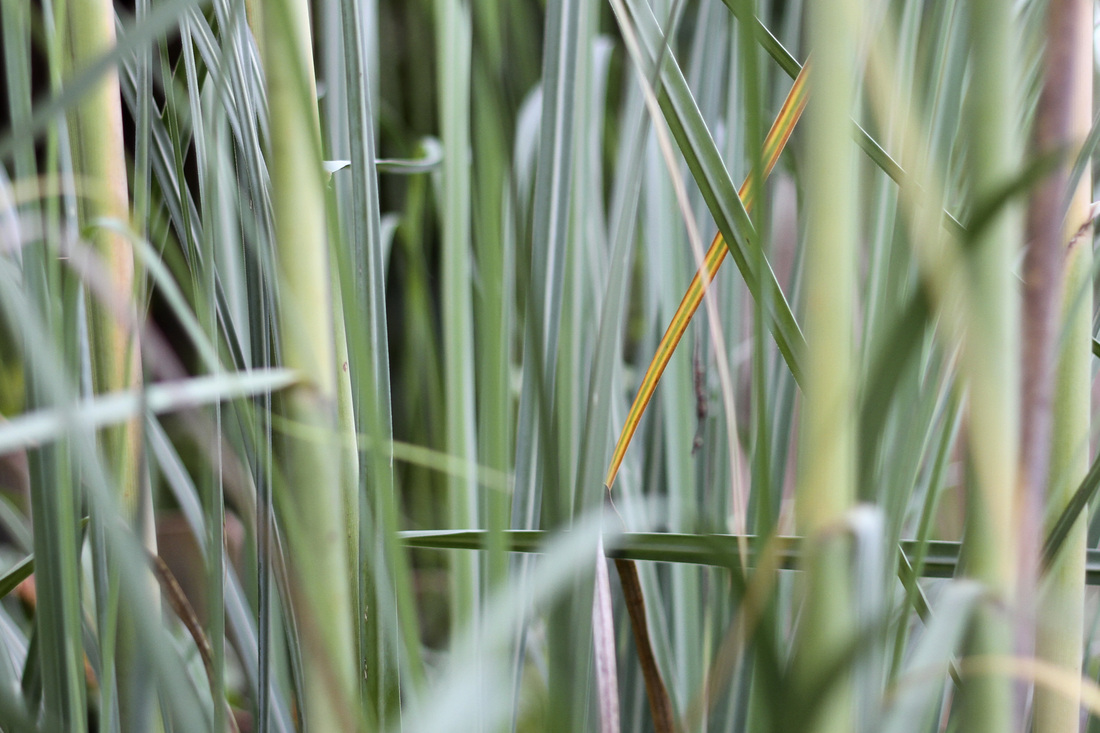 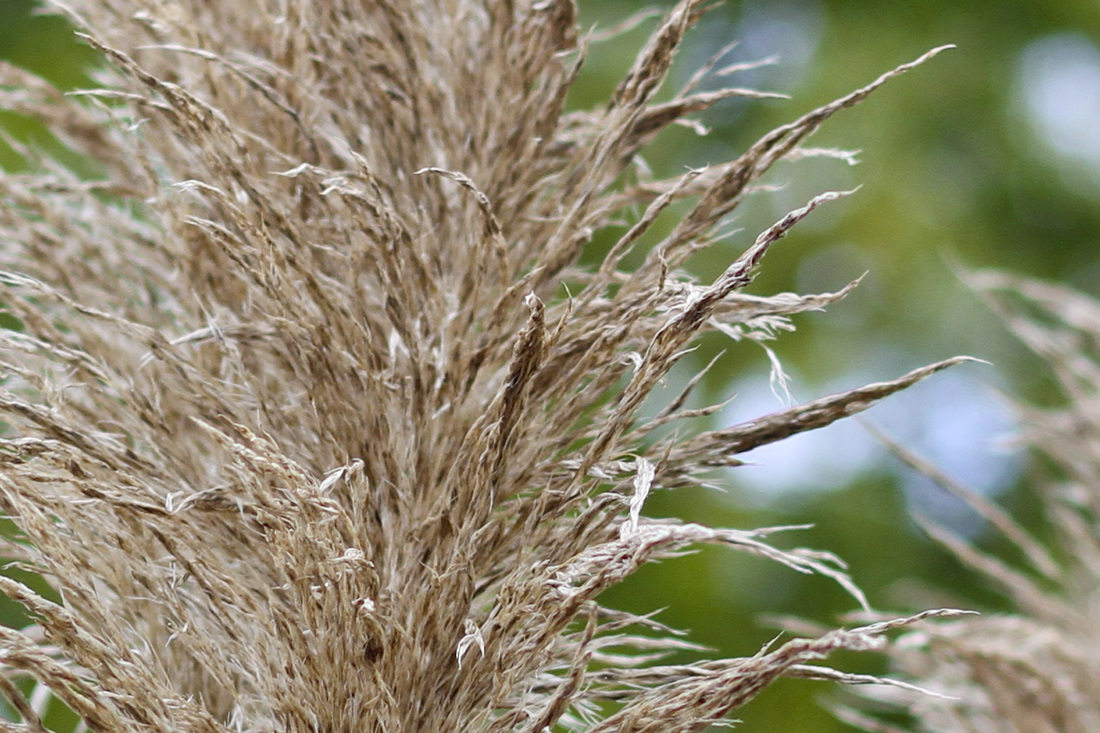 And here is some of our fall bounty of cherry tomatoes. (I posted here about growing our first tomato plant.) We learned this year that it's kind of silly to have one tomato plant. I suppose everyone else already knows this. We get one or two tomatoes at a time, which is fun for Cricket—the biggest tomato lover in history—but not enough to do much with. To remedy this situation, we're prepping a garden plot this fall that will be large enough for several tomato plants, among other things. More to come on that project in a few weeks... 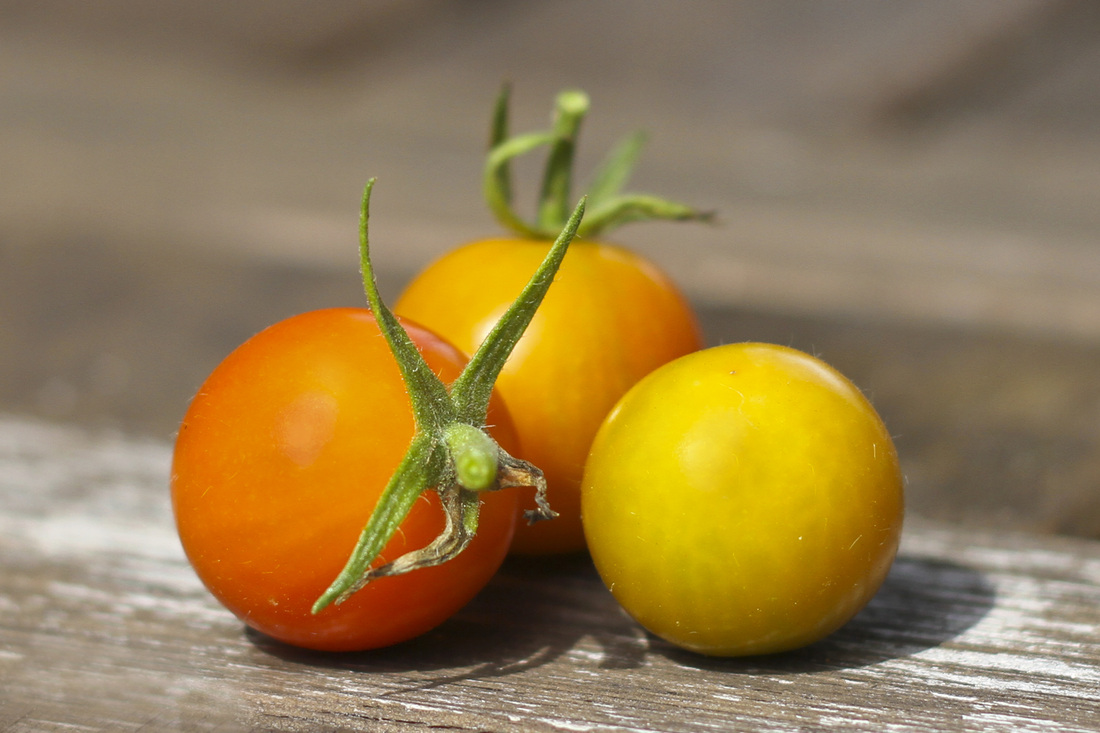 Remember our vibrant hydrangeas? They've slowly withered and crumbled into these fabulously muted shades.  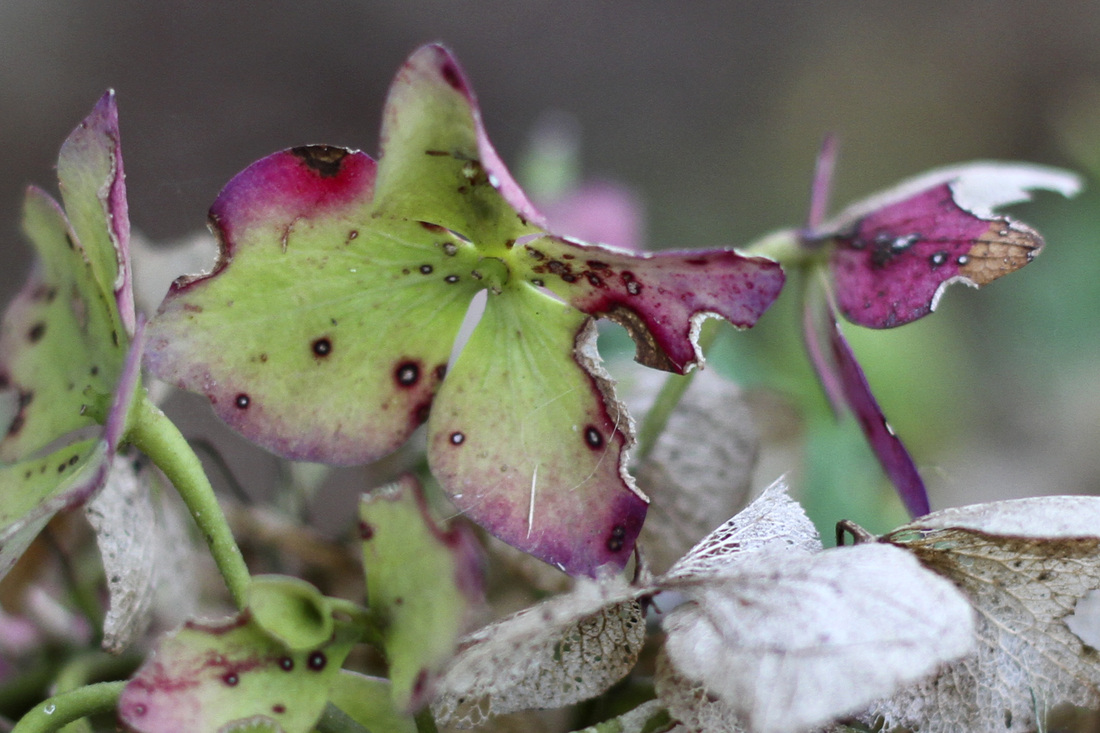 This seed pod was poking out of the hydrangeas. 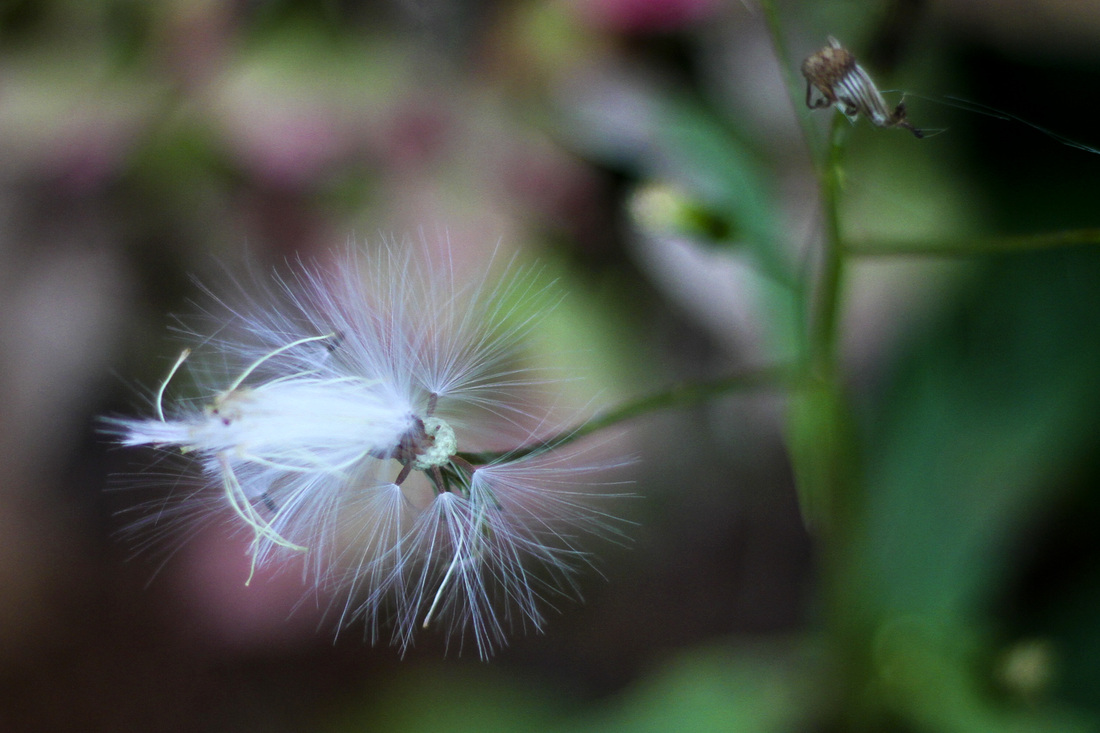 Happy pumpkin hunting!
P.S. In my next post, I'll be sharing an easy fall DIY centerpiece. 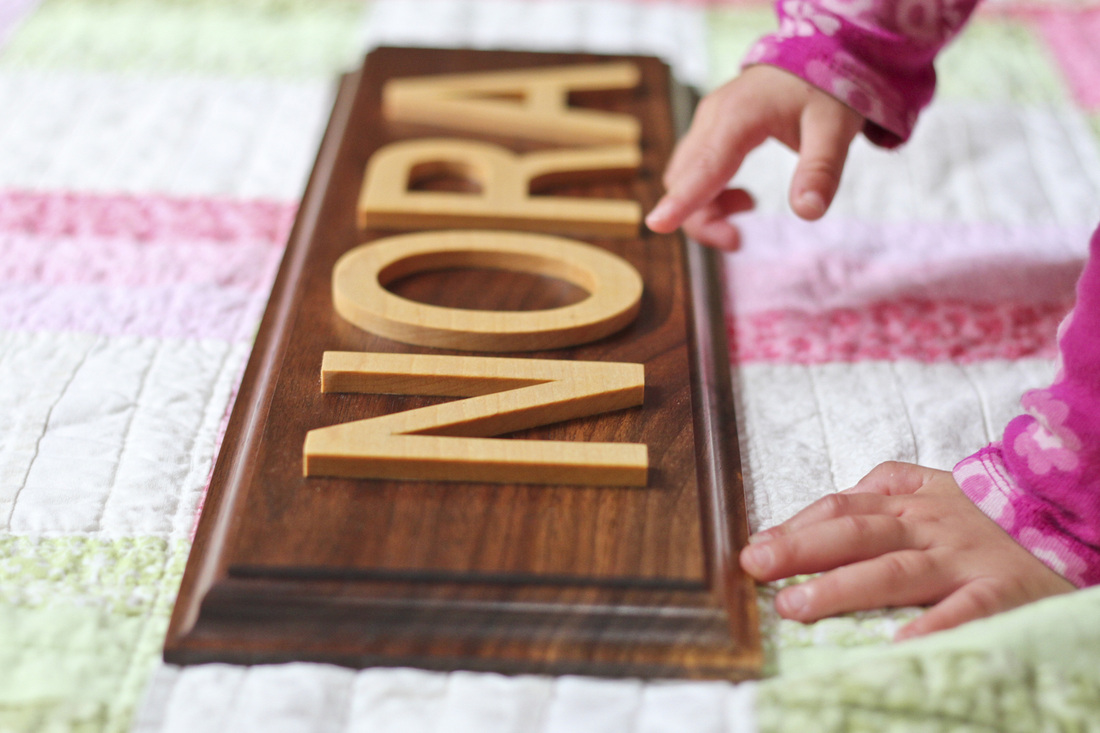 Nora just moved from our room into her nursery. Eek! Now she feels so far away at night—until she wakes up and wants to eat and ends up back in our room. This lovely name plaque, made by my uncle, arrived a few weeks after Nora's birth. You might recognize my uncle’s handy work from the numbers plaque he made for Cricket. We had pretty much abandoned the nursery the last few months but are now back tweaking some accents to transform it into Nora’s special place. Hanging this sweet little sign seemed like the perfect first step. These photos not only demonstrate the sign's fine craftsmanship but also what happens when you place a foreign object on our floor to photograph it. Above: The first shark circles, poking and prodding. Below: The second shark arrives, with assistance, to begin her own investigation.  Below: Soon the sharks launch a coordinated attack, and you know you better remove the foreign object before they tear it to shreds.  Below: So up on the wall it goes—safe and sound and pretty. 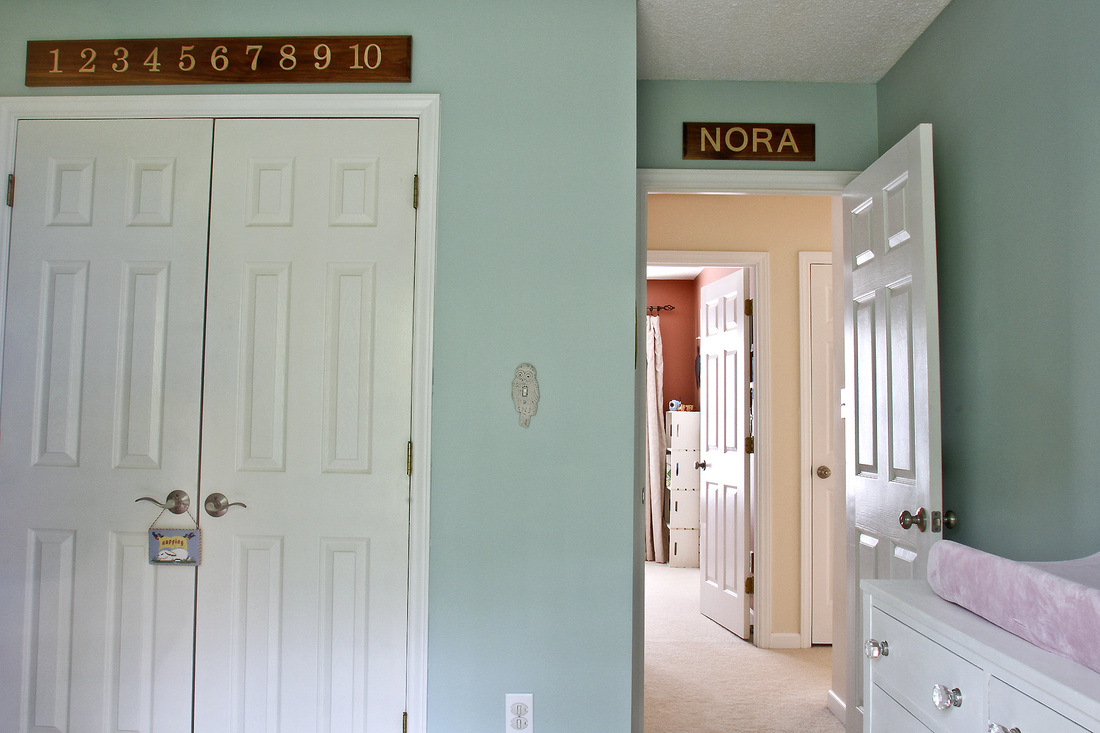 See the full nursery tour here.
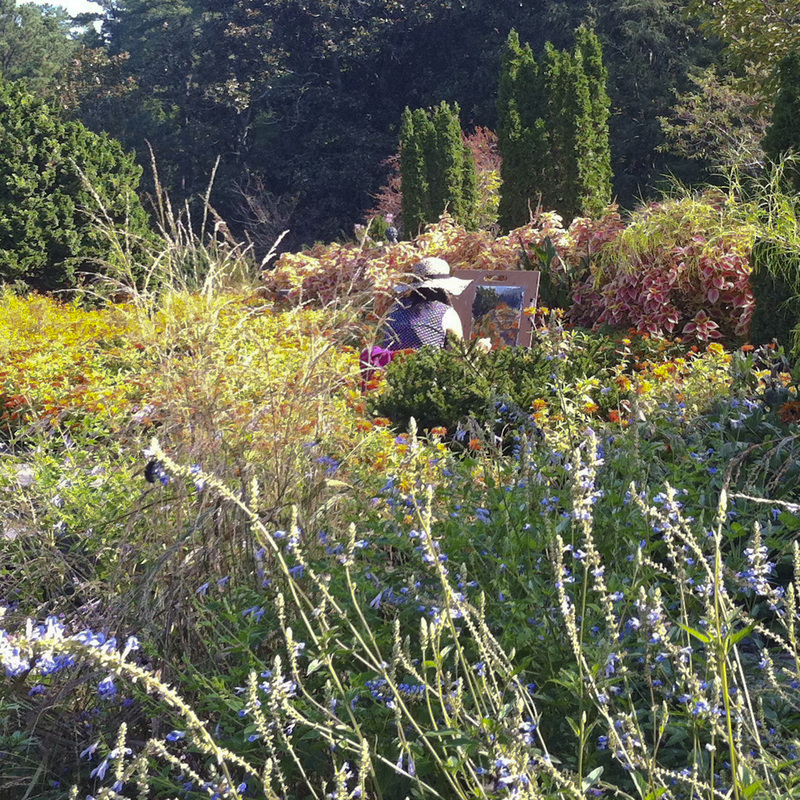 Dear lovely readers, This post is for you. It is a thank you note for visiting Calm Cradle. Whether you're a regular, occasional or first-time reader, you inspire me! Thank you! Nine months after launching my blog and shop—don’t forget my little shop, which I’ll be updating soon—I’m happy to report that my readership has grown, and continues to grow, well beyond my expectations. I'm also happy to report that life with two babies is beginning to fall into more dependable patterns, allowing me to carve out a bit more time for regular blogging. (So what if I've pulled together 90 percent of these posts while feeding the baby?) It's always a little surprising to see which posts receive the most hits. Sometimes they are the ones closest to my heart (people love photos of my girls, which makes me smile) and other times they are things I pulled together quickly just to keep some momentum going. Oh, and it seems readers can't get enough of DIY posts. Regardless of which posts are most popular, I'm thrilled to have a venue for sharing some photos and ideas that would otherwise remain tucked away on a hard drive or in a notebook. As the end of the year draws closer, I'd like to share some goals I'm formulating for the upcoming holidays and 2013. (The crisp fall air is giving me a kick in the pants to get organized for exciting holiday-related posts!) So here goes: 1) Be more deliberate in selecting subjects for posting. Until now I've given myself license to write posts on whatever sounds interesting and manageable given my primary job as a full-time mom. I'm still going to do that but am also going to try to be more mindful in varying the posts between portraits, DIY, nature photography, home projects, travel and random motherhood musings. In doing so, I hope to keep you reading regardless of which types of posts are your favorites. I even created an editorial calendar (I know, I know—so professional.) 2) Focus on writing "my love letter to my family." In my post last Valentine's Day, I wrote: "Despite the specific reasoning for each home improvement task we take on, I now consider all of them words or phrases that make up the ongoing love letter my husband and I are writing to our family. That thought makes it all worthwhile, because it’s our hope that the home we create will be our kids’ safest, happiest and most restful place on earth." Sometimes I feel like my blog is all over the place with no common theme tying it together. But after reviewing nine months of posts, I realized that if I consider my blog a documentation of this "love letter," and this love letter includes not only the creation of our physical home but also the activities, surroundings and emotional support we offer our children as the broader perch from which they view the world, then this blog does indeed have a theme. Moving forward, I'll ask myself whether each post contributes to my broadened love letter—and whether it might inspire yours. 3) Post once or twice each week. I hope to post Mondays and either Wednesdays or Thursdays, so you'll have something to read during the week when you're procrastinating at your desk or need a breather from attending to kids. I'll take breaks during vacations, holidays and when my family is experiencing another plague, which seems to be every other day this time of year. 4) Spur comments, conversation and community. In my original welcome post, I wrote: "I’d love to start a dialogue on this blog about the process of creating nurseries and homes that serve as peaceful, thought-provoking refuges for our families." But in truth, I've been shy to try to strike up conversations with you; I'm afraid no one will participate. Now that I know—in an anonymous, statistical way—I have readers out there, I want to encourage you to speak up. Be the first to comment on a post to make others comfortable! Let's create a dialogue together. Thank you, thank you for visiting Calm Cradle! Above: Painter at the Sarah P. Duke Gardens. (Captured with iPhone.) Below: Hawk over pasture on Sunday morning. (Captured with iPhone.) 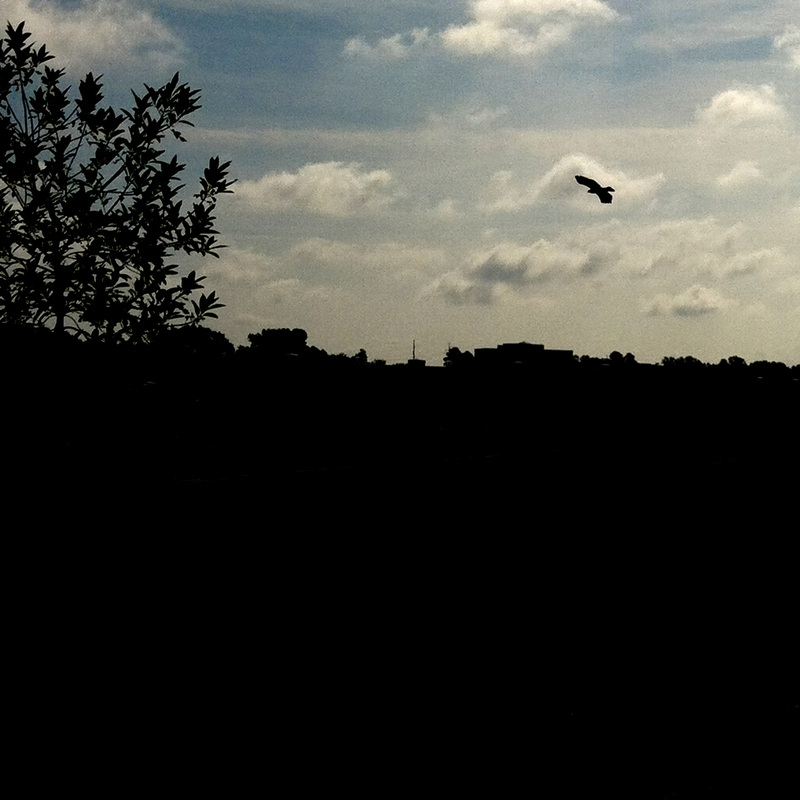 |
My new book is out! Click to learn more about it.
Hello there
I'm Julia Soplop, writer and photographer. I believe there is something profound in bearing witness to moments of joy and pain in others’ lives. My husband, three girls and I live outside of Chapel Hill, NC. You can read more about me here.
Snag my new photo curriculum for kids!
Categories
All

Popular posts |